
Nodes and Scenes: The Building Blocks of Godot
Every Game you make with Godot will be comprised of these little things called “Nodes”. To understand what a node is, think about when you were young and you put puzzle pieces together to form an entire picture. In essence a node is just that. It’s akin to a puzzle piece. Once you have all of your pieces together you have a scene. A Scene can represent almost anything. It could be a level in your game, it could be a player, maybe it’s a game over screen. Just about anything you can think of can be a scene.
Making your first scene
Enough with theory let’s show you how you would apply a scene in Godot. In the editor go ahead and switch to 2D at the center top if you’re not already there. On the left where it says Create Root Node and below that you have options for 2D Scene, 3D Scene, etc. Go ahead and click 2D Scene. It will say Node2D but you can rename it to whatever you’d like by right clicking on it and selecting rename. It’s always best practice to name your scenes according to their use case. So if this was for example a game over screen I would name this game_over. In fact let’s go ahead and make a basic game over scene. Go ahead and rename Node2D to game_over. Once you’ve done that it’s now time to add a node. Right click on the game_over scene you just made. Select “Add Child Node” and type in “label”. You should see a window like this pop up.
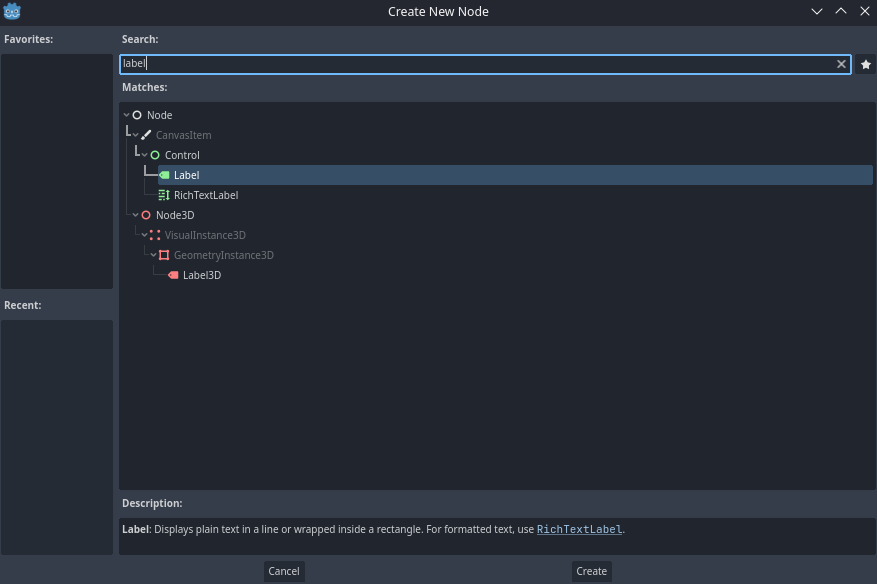
At the bottom of the window notice how Godot gives us a nice description of what the selected node does so if you’re ever unsure you can reference that. Go ahead and select Label.
Nodes Nodes and More Nodes
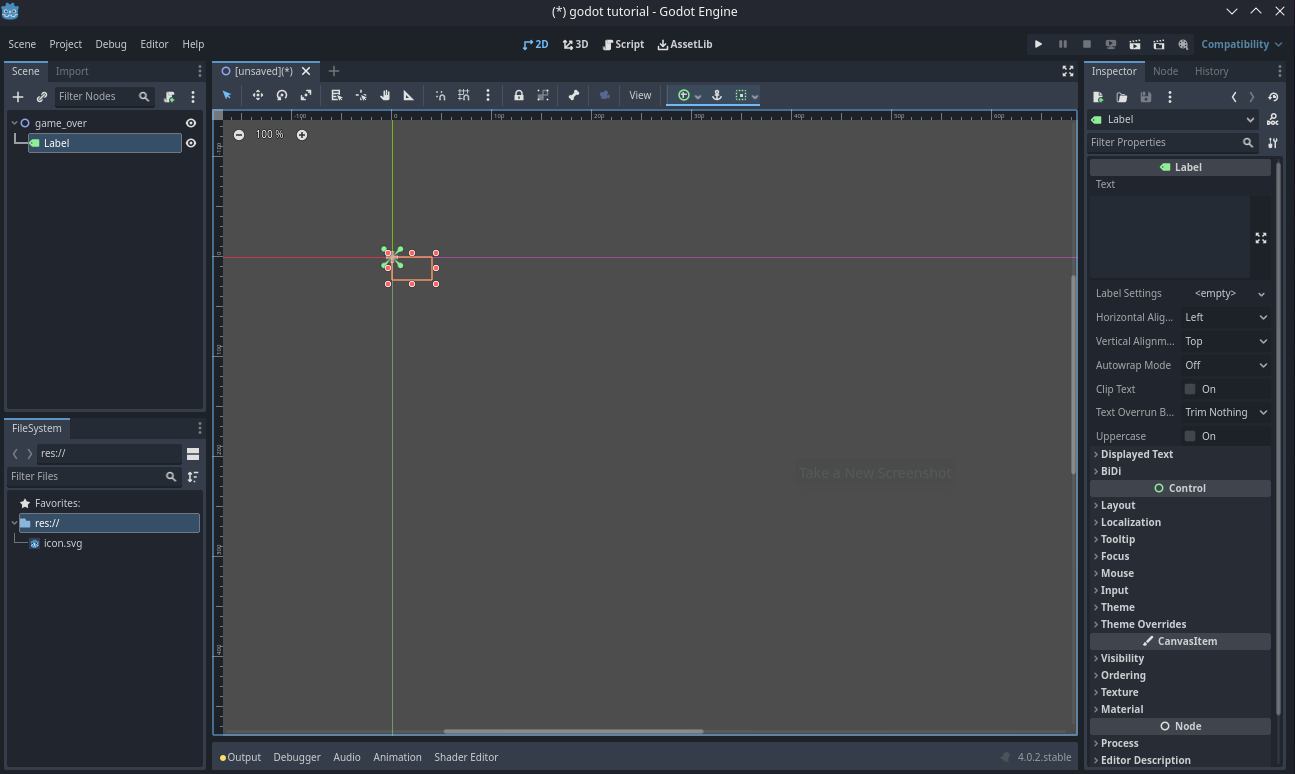
What’s going to happen at this point is Godot is going to take the label node we just selected and it will import it into our scene. Do you see the textbox on the right side panel? Go ahead and type GAME OVER into it and see what happens.
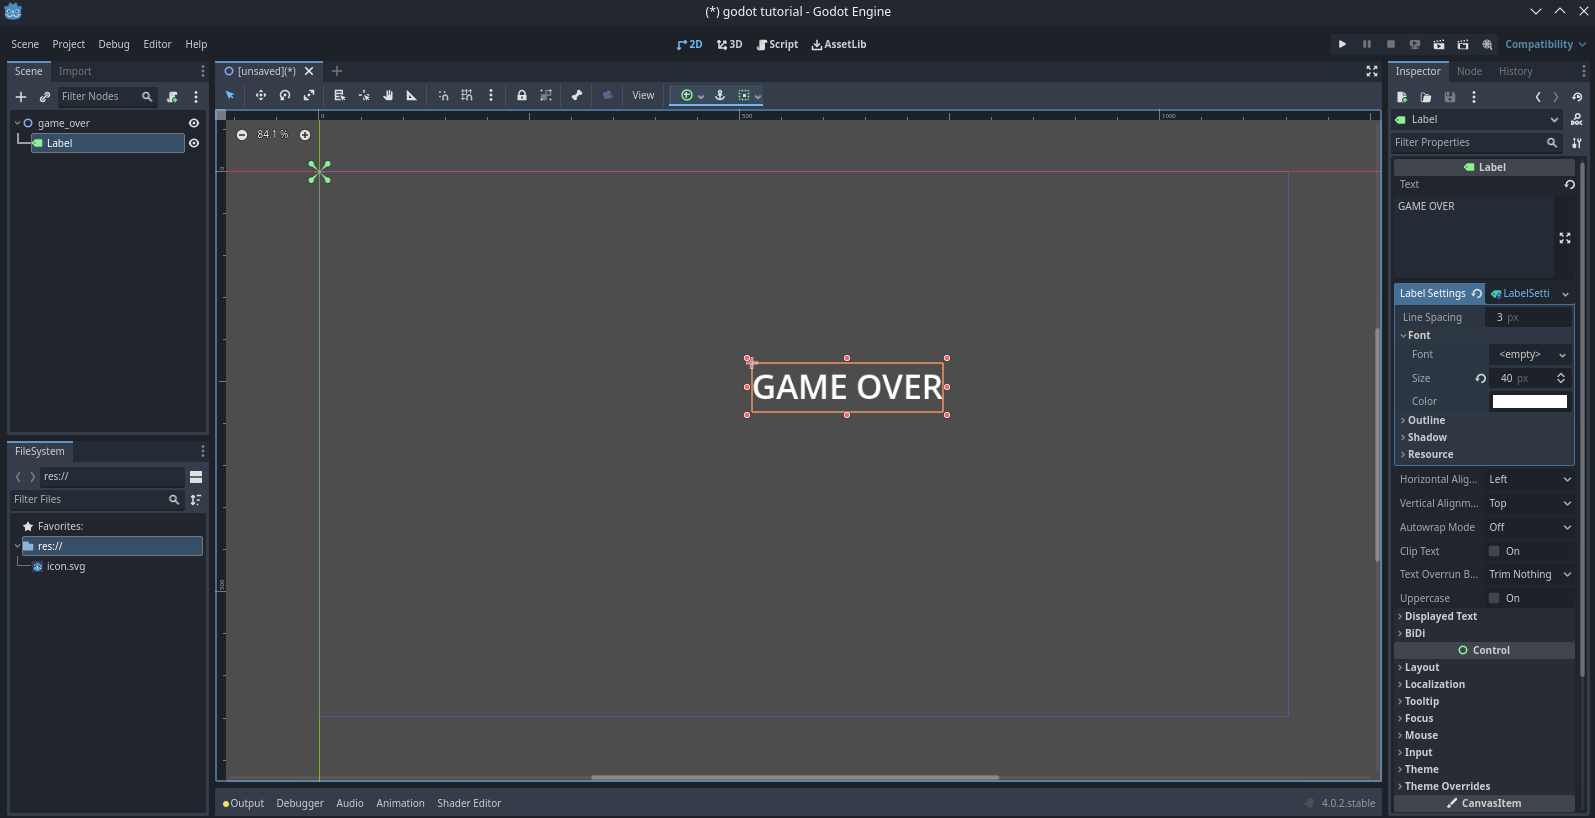
At first the text may appear a tad small. If you would like it to be larger simply navigate to the “Label Settings” on the right panel and click into it. Select New Label Settings. Click on it once and you should see a few options populate one of those being font. Click on font and you see an option for font size. This is where you can increase the size of the text. I set mine to 40 but you’re free to do whatever you would like here. Now once you have a size you’re good with, go ahead and select the label box by left clicking. Hold ALT and drag it to the center. Your screen should look somewhat like this.
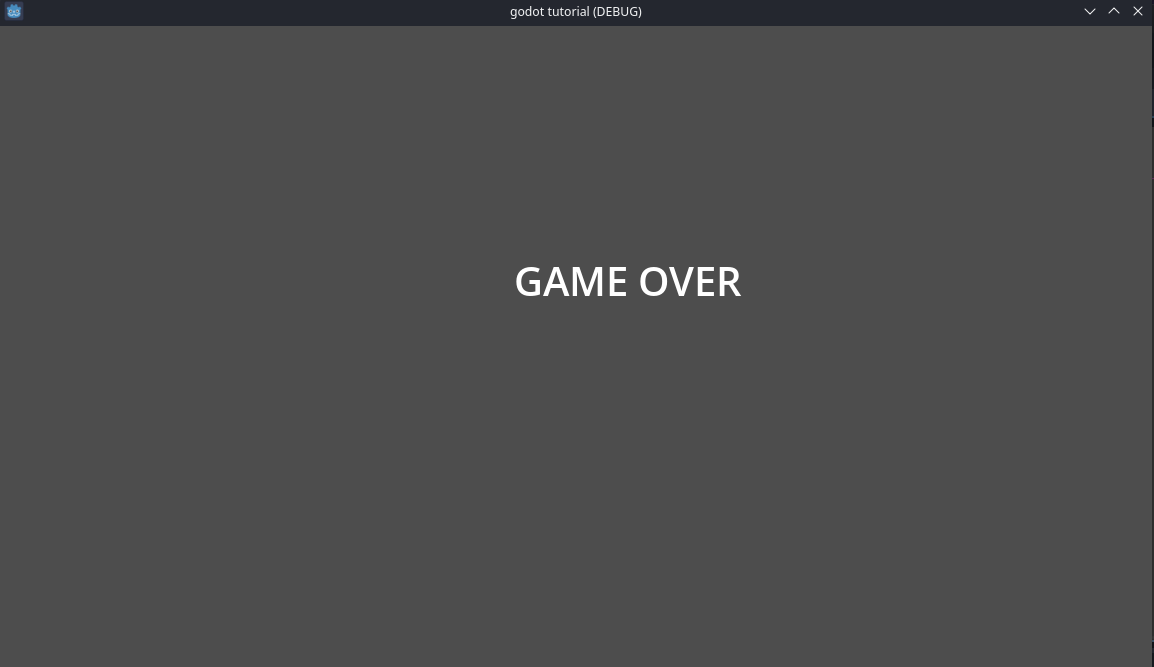
Now this is exciting and all but how do we actually get this running in game you ask? Well like most things with Godot it’s pretty simple. You see up at the top right there’s a play button? Go ahead and click that. Godot may prompt you about no main scene being defined. Just select current and then save the scene. Once done Godot will save your files and then build the project. After that you can pat yourself on the back you just built your first project in Godot! 🎉
In the next release of “Game Dev with Godot 4” we will cover the basics of scripting with GDScript so we can make our Game Over Screen a little more interesting. We will cover how in our game we can attach scripts and programatically make magic happen. Well not really magic but it sure will seem like it. Until then take care and good luck!